To improve email deliverability MailHawk provides both SPF and DKIM records which you can add to your DNS which will authenticate your domain and prove that MailHawk can send emails on your behalf.
While this step is optional, it is highly recommended and will result in more of your emails reaching their destination.
Add MailHawk to your SPF record
Managing your SPF record can vary depending on your hosting service, we have linked various documentation articles for a number of hosting companies below. Choose your hosting company and follow the instructions to add to your SPF record.
Many of these articles are curated by third-party sites not affiliated with MailHawk in any way. We do not guarantee the relevance of any information linked above.
Once you’ve created your SPF record add the following to it so MailHawk is listed as an authenticated sender.
include:spf.mta01.mailhawk.ioOnce it’s all put together it should look like this:
v=spf1 a mx include:spf.mta01.mailhawk.io ~allYour SPF record may look different if you have additional IPs or other senders. The above is only an example.
Verify your domain with DKIM
You can take authentication a step further by authenticating your domain with DKIM. DKIM proves your sender identity to services like Outlook and Gmail. Much in the same way of adding an SPF record, we now need to create a DNS record.
Go to the MailHawk Plugin page which is found under the Tools section of WordPress.

Go to the Domains tab.
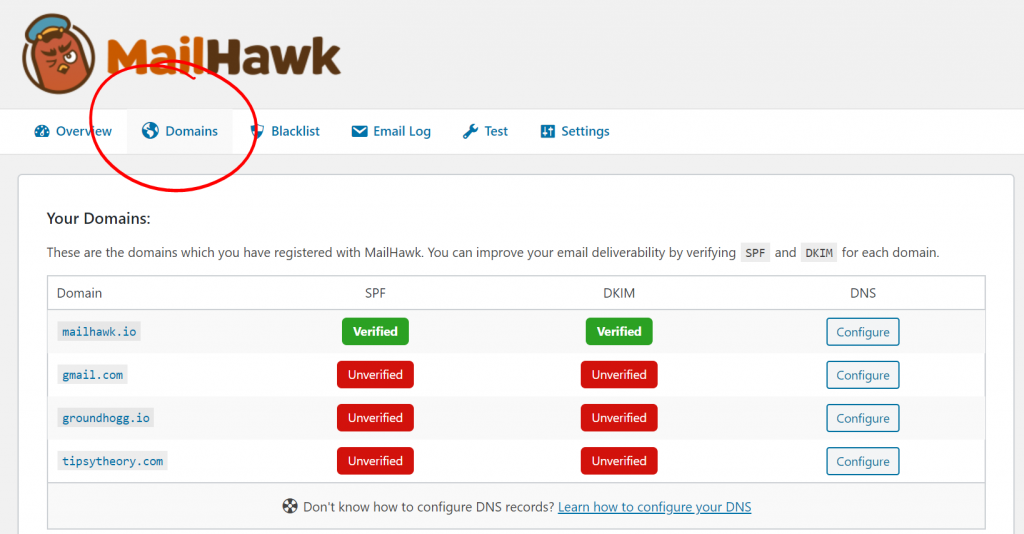
Click on the Configure button to view the DNS records for the domain,
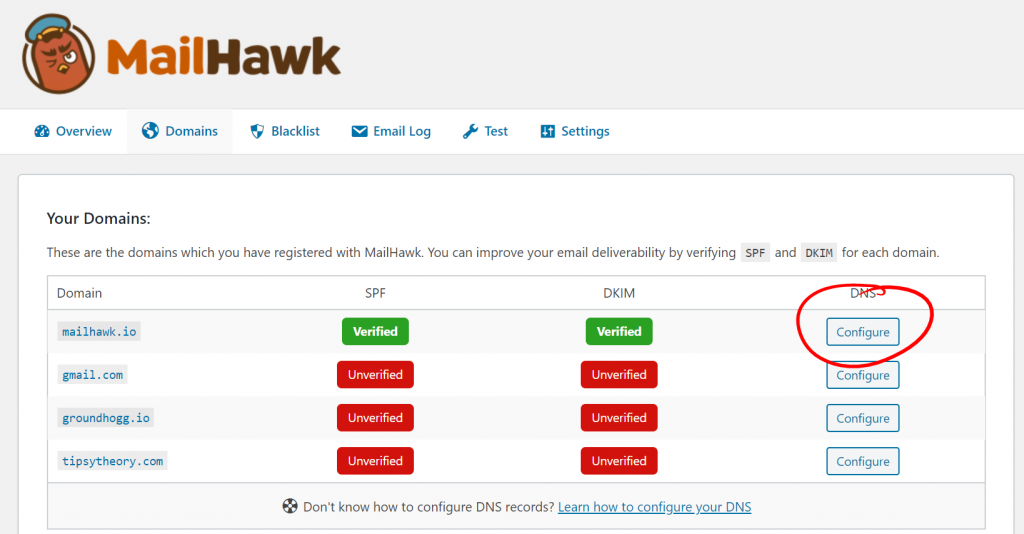
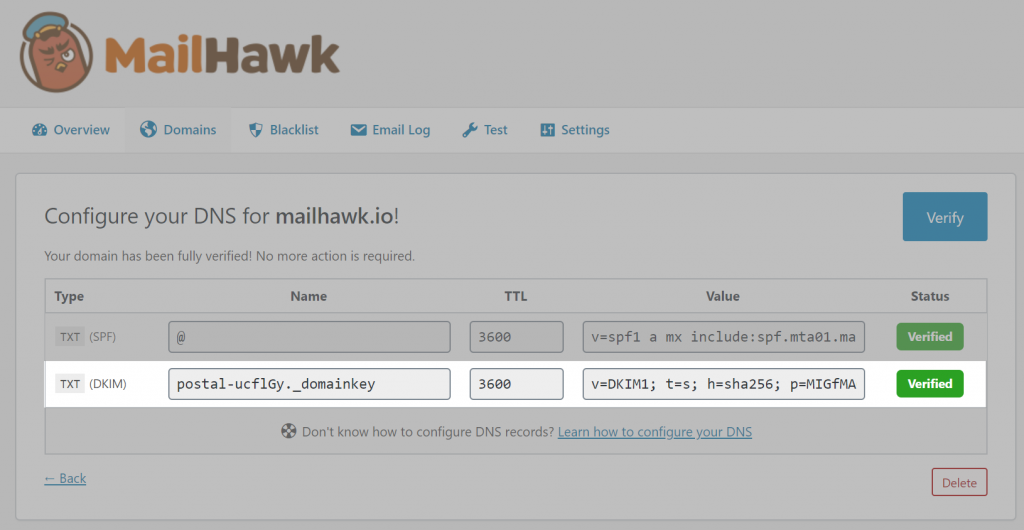
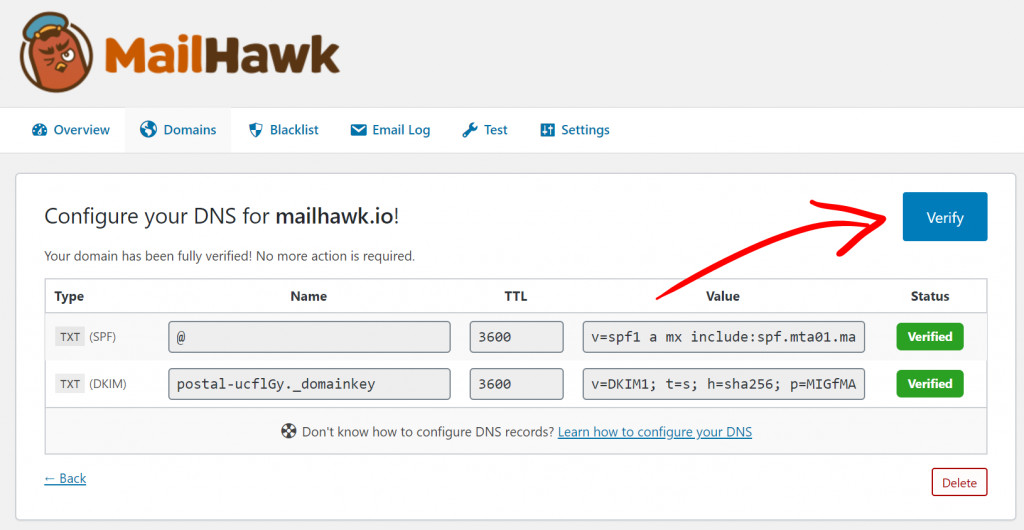
You will see two DNS records. The top one is your SPF record, the bottom one is your DKIM. We are only concerned with the DKIM record for now.
In a new tab, open up your DNS Zone Editor. If you do not know what this is, ask your hosting company and they will point you in the correct direction.
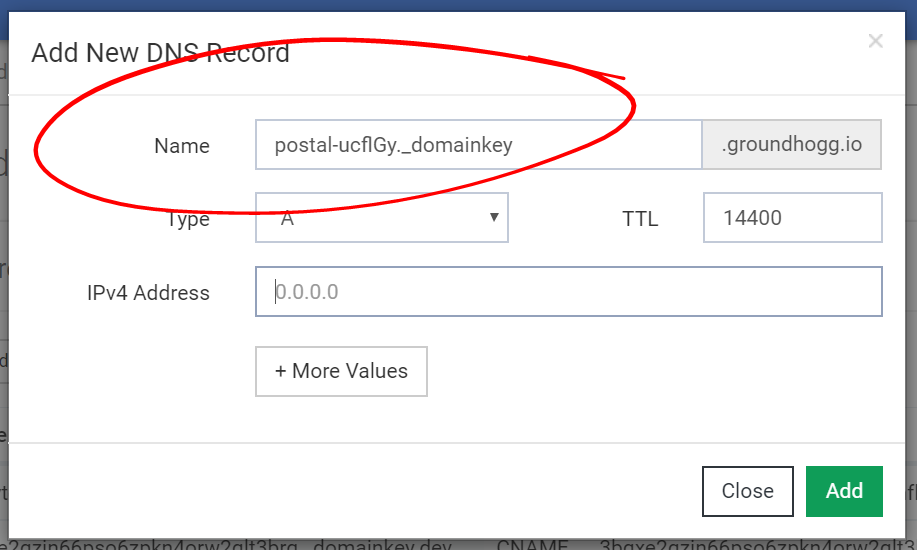
What you are going to do is copy and paste the DNS record information from the MailHawk plugin into a new record in your DNS Zone Editor.
Copy the record name and paste it into the NAME section when adding a the record.
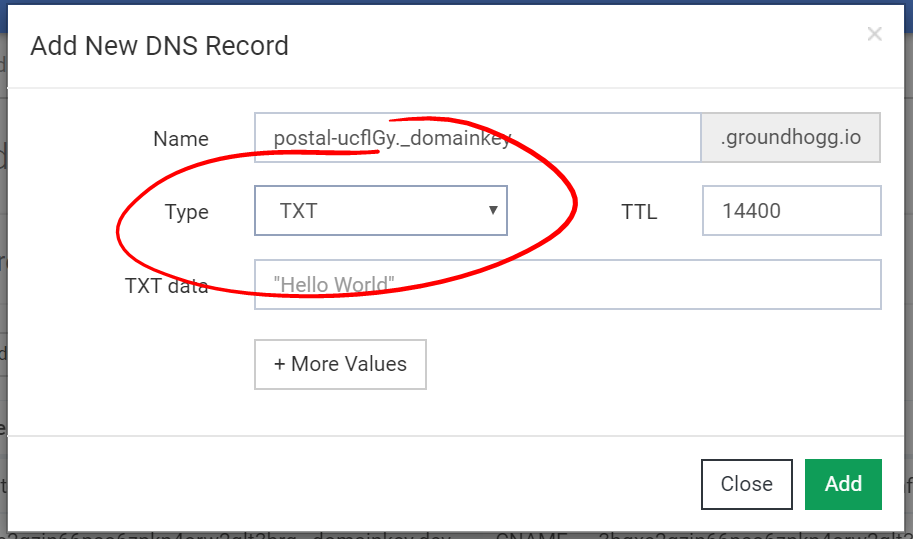
Make sure you select the type as TXT.
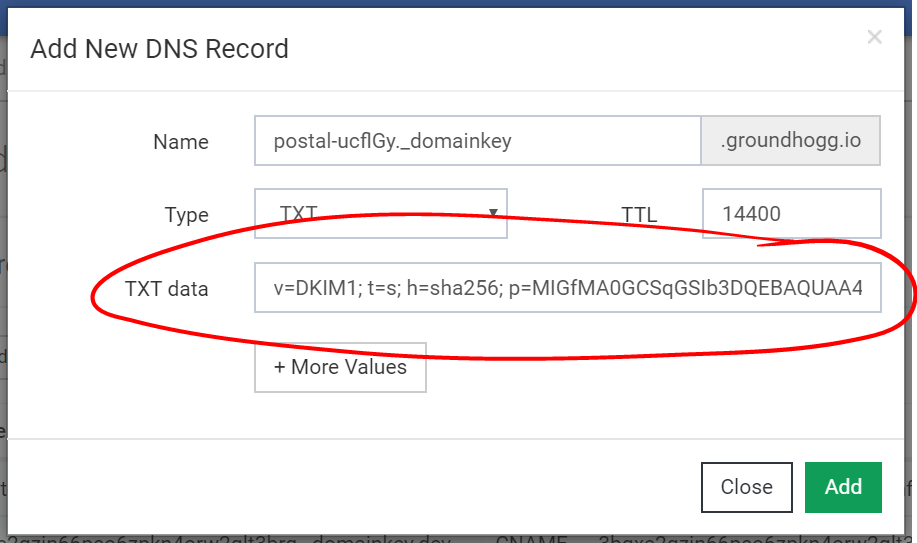
And paste the DKIM information into the TXT DATA area.
Verify your configuration is correct
Once you’ve modified your SPF record and added your DKIM, you can go back to the MailHawk plugin to see if you did it right.
Click the Verify button in the top right. Once both say records say Verified your configuration is complete!
Don’t see your host?
If you do not see the documentation for your hosting company let us know and we’ll get you the correct information.